During this Catch-Up Session from last week i began working more on the exercises while beginning my fourth Model.
 |
| Who wants to make a Snowball! |
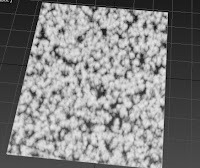
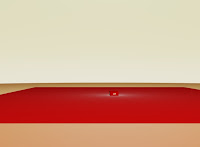
However, i first started with the final Texture Exercise on making a Cloud Plane. I followed the instructions however i find that all of it may've went a bit to waste as the final result looks more like snow on a Car's front window - i assume that i've missed a bit or pressed a button i shouldn't have but sometimes i did find the instructions hard to follow.
 |
I did look at it once or twice
and wonder what it did... |
 |
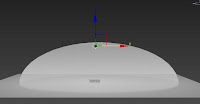
Put a Half-Sphere in a box, on a plane, in a room, in a
mainframe in a computer box, which is in a bigger room,
in a bigger house which is on a bigger sphere
in a bigger Galaxy!!! |
 |
| I should test it, but there is little time |
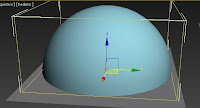
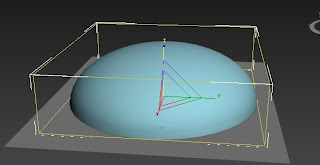
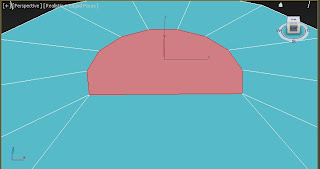
Afterwards i started working on the Lights exercise. For my animation i find that Lighting may play a relevant role in the scenes, considering that i'll be in a battlefield atmosphere and there are some complex shapes in my models. The first model involved creating a Sky using the
Geosphere option, overall the use of it is very straightforward, however it does worry me about the high polygon rate to consider using it. I followed the exercise fine, mostly due to only having to create and modify the Geosphere (seeing as we didn't have the correct Sky Texture as previous 3DS Max versions would have). I do feel a little confused about why we need an xform modifier to scale the Geosphere though, although it does make a box around it to simplify the scaling i still don't see how the Geosphere would act differently to any other primitive in this position.
 |
| Facing Omni |
 |
| Not Facing Omni |
The next exercises involved using
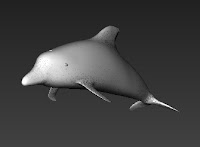
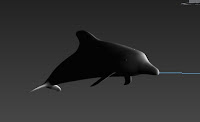
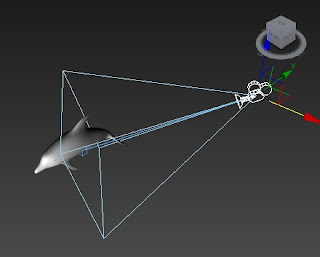
Omni Lighting. At first i couldn't find it as i was on a different setting, when i did find it i struggled to place it via a single viewport when placing it in a Geosphere - resulting me in using all four viewports, although i do now think that it would have been quicker to use the Align tool instead. When i first used the Omni light it became apparent to what its function was, this was shown through the Dolphin Exercise, when i think about this regarding my Animation, i think that it can only be utilized when lighting something the camera would be facing directly at, however, i could see it be used on other elements like Walkers and it could possibly provide shadow on the lower wings of my Tie Fighters.
 |
| Good for Prioritising |
 |
| Let there be LIGHT |
When using the Omni light on the Skydome i found that the include/exclude option could be helpful for lighting things like the Star Destroyer for added emphasis or perhaps lighting for the 'internal models' (so the Engine Room or the Star Destroyer Cockpit). When completing the exercise however i did find that there Geosphere didn't go red like it said, i don't know if it is down to the Geosphere being in X-ray mode when it was rendered or by some other anomaly, overall though it does mean that i avoided a common error within the Task.
 |
What was that riddle with the
red house again? |
 |
| The Target is In Sight |
Next was Cameras, Cameras seem rather simple to me - mainly due to the fact that it's more 'click and place'. Although this week's lecture delved more into the basic uses of the cameras this task was simply to place a Point and Target Camera. Point Cameras (just placing it in a fixed position) will be useful for the majority of the animation, as more of the models will move (or explode) around the camera rather than with it; which is what a Target Camera does. The Target Camera will fix itself to an Object and move with it from that fixed point (so if it was fixed to a Tie Fighter moving across it, it would follow the Fighter's path while still being in the same position), the use of a Target Camera would be minimal, probably only used inside the cockpit when the windows show the fighter falling and possibly in the Engine room to shake at little and exaggerate the Explosion (we'll get to that next week).
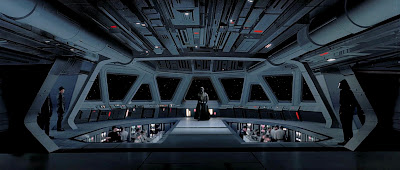 |
| Image - http://media.screened.com/uploads/0/2789/327232-executorbridge.jpg |
Following the completed exercises i began work on my Cockpit, which will now be called the Deck as it's better suited and less innuendo-encouraging. The Deck's reference is a legitimate Star Destroyer deck (unlike the engines which was actually the main generator of the Second Death Star) taken from a google search; although the deck is completely different to that drawn on the storyboard, i feel it'd be more challenging and more accurate to use the image screenshotted from the films than one i created from fragmented images in my head.
 |
| What is with Spaceships and having holes on the roof!? |
The process of creating the Deck was similar to the Engine Room, but hopefully with less errors. The inside effect is once again done by removing the faces of some Cylinders - luckily the room has a somewhat round feeling to it anyway. To create the smaller hole on the ceiling of the room, i once again had to use an inset on the roof polygon with the intent of extruding it, a similar method might be donned to make the Trapezium windows, but with those i can remove the face to make the Window effect. In addition, i intend to use modified Boxes and Cylinders to create the roofing and hallways, and possibly a Boolean Union alongside Polygon Deleting to create the lower platforms in the center of the Room.


No comments:
Post a Comment